
|
|
|
|
by Editor Michel Romaggi in collaboration with the author Alberto de la Cruz.
Edited and published by Yvette Depaepe, the 26th of November 2025
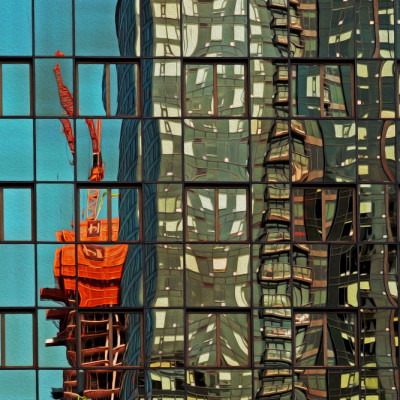
This photograph depicts a typical main street at noon, a time when people are enjoying aperitifs or lunch. It was taken in Buitrago de Lozoya, a town in Spain on the River Lozoya near Madrid, which is known for its well-preserved Moorish walls.
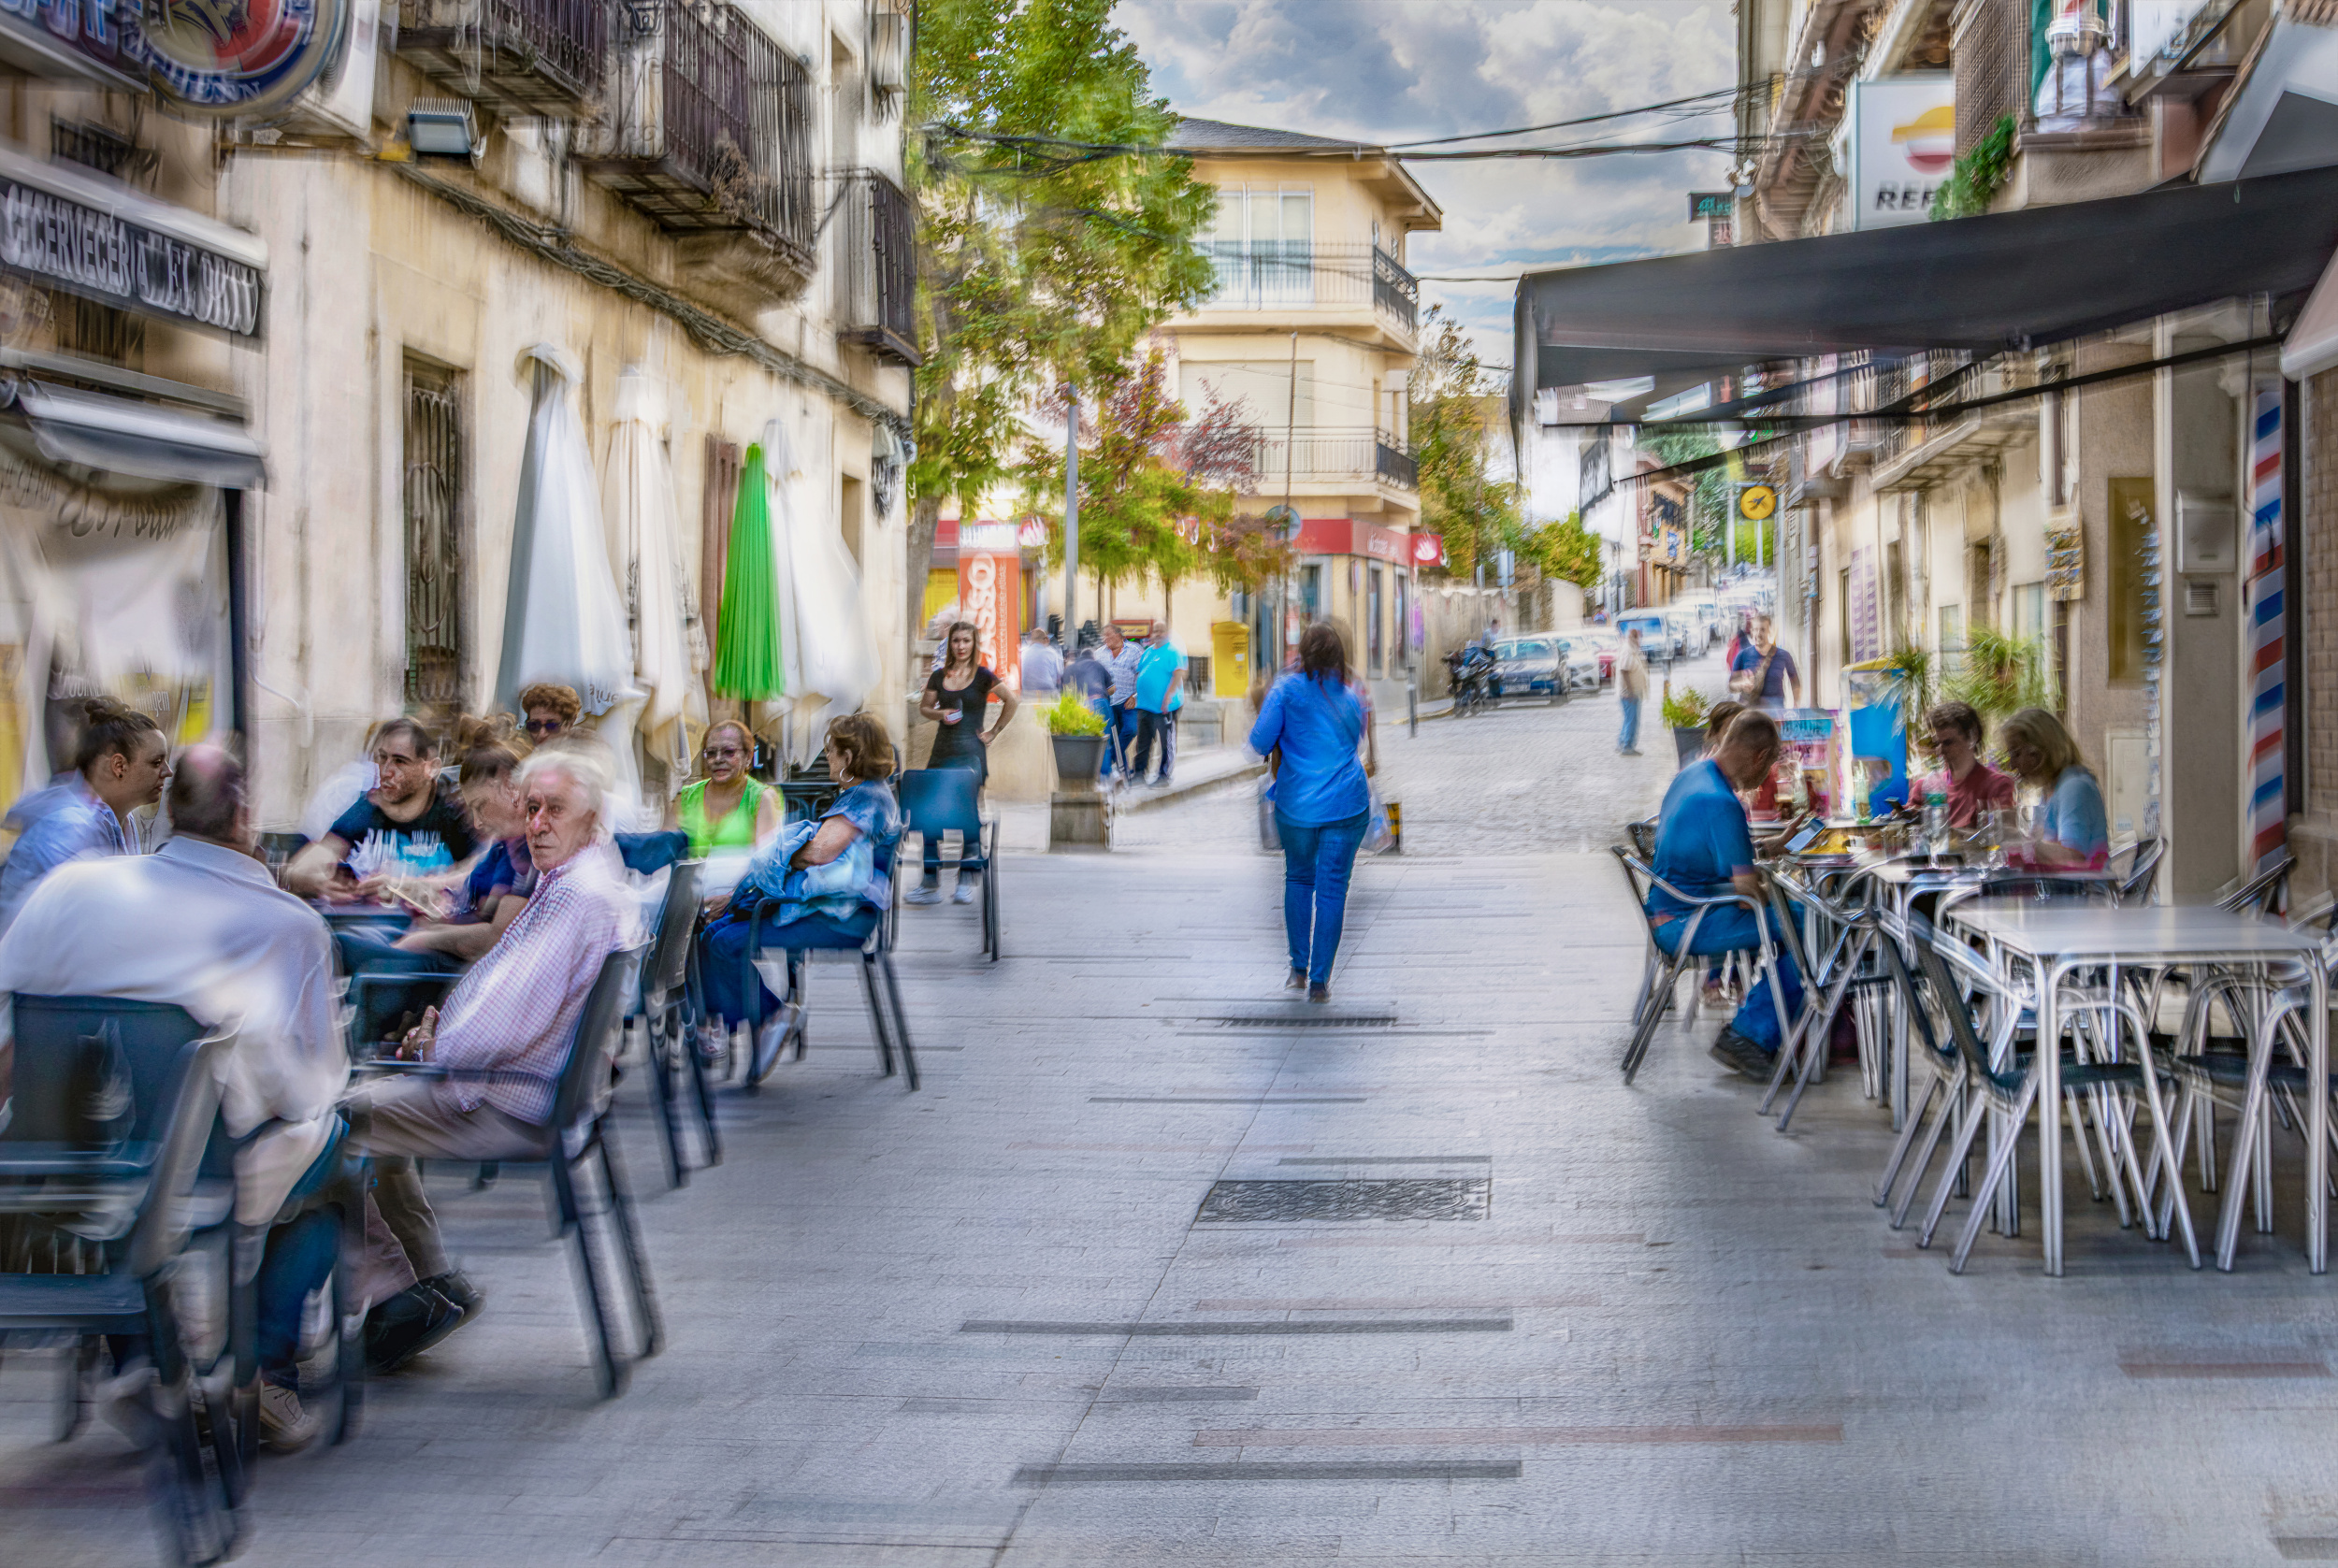
'At noon'
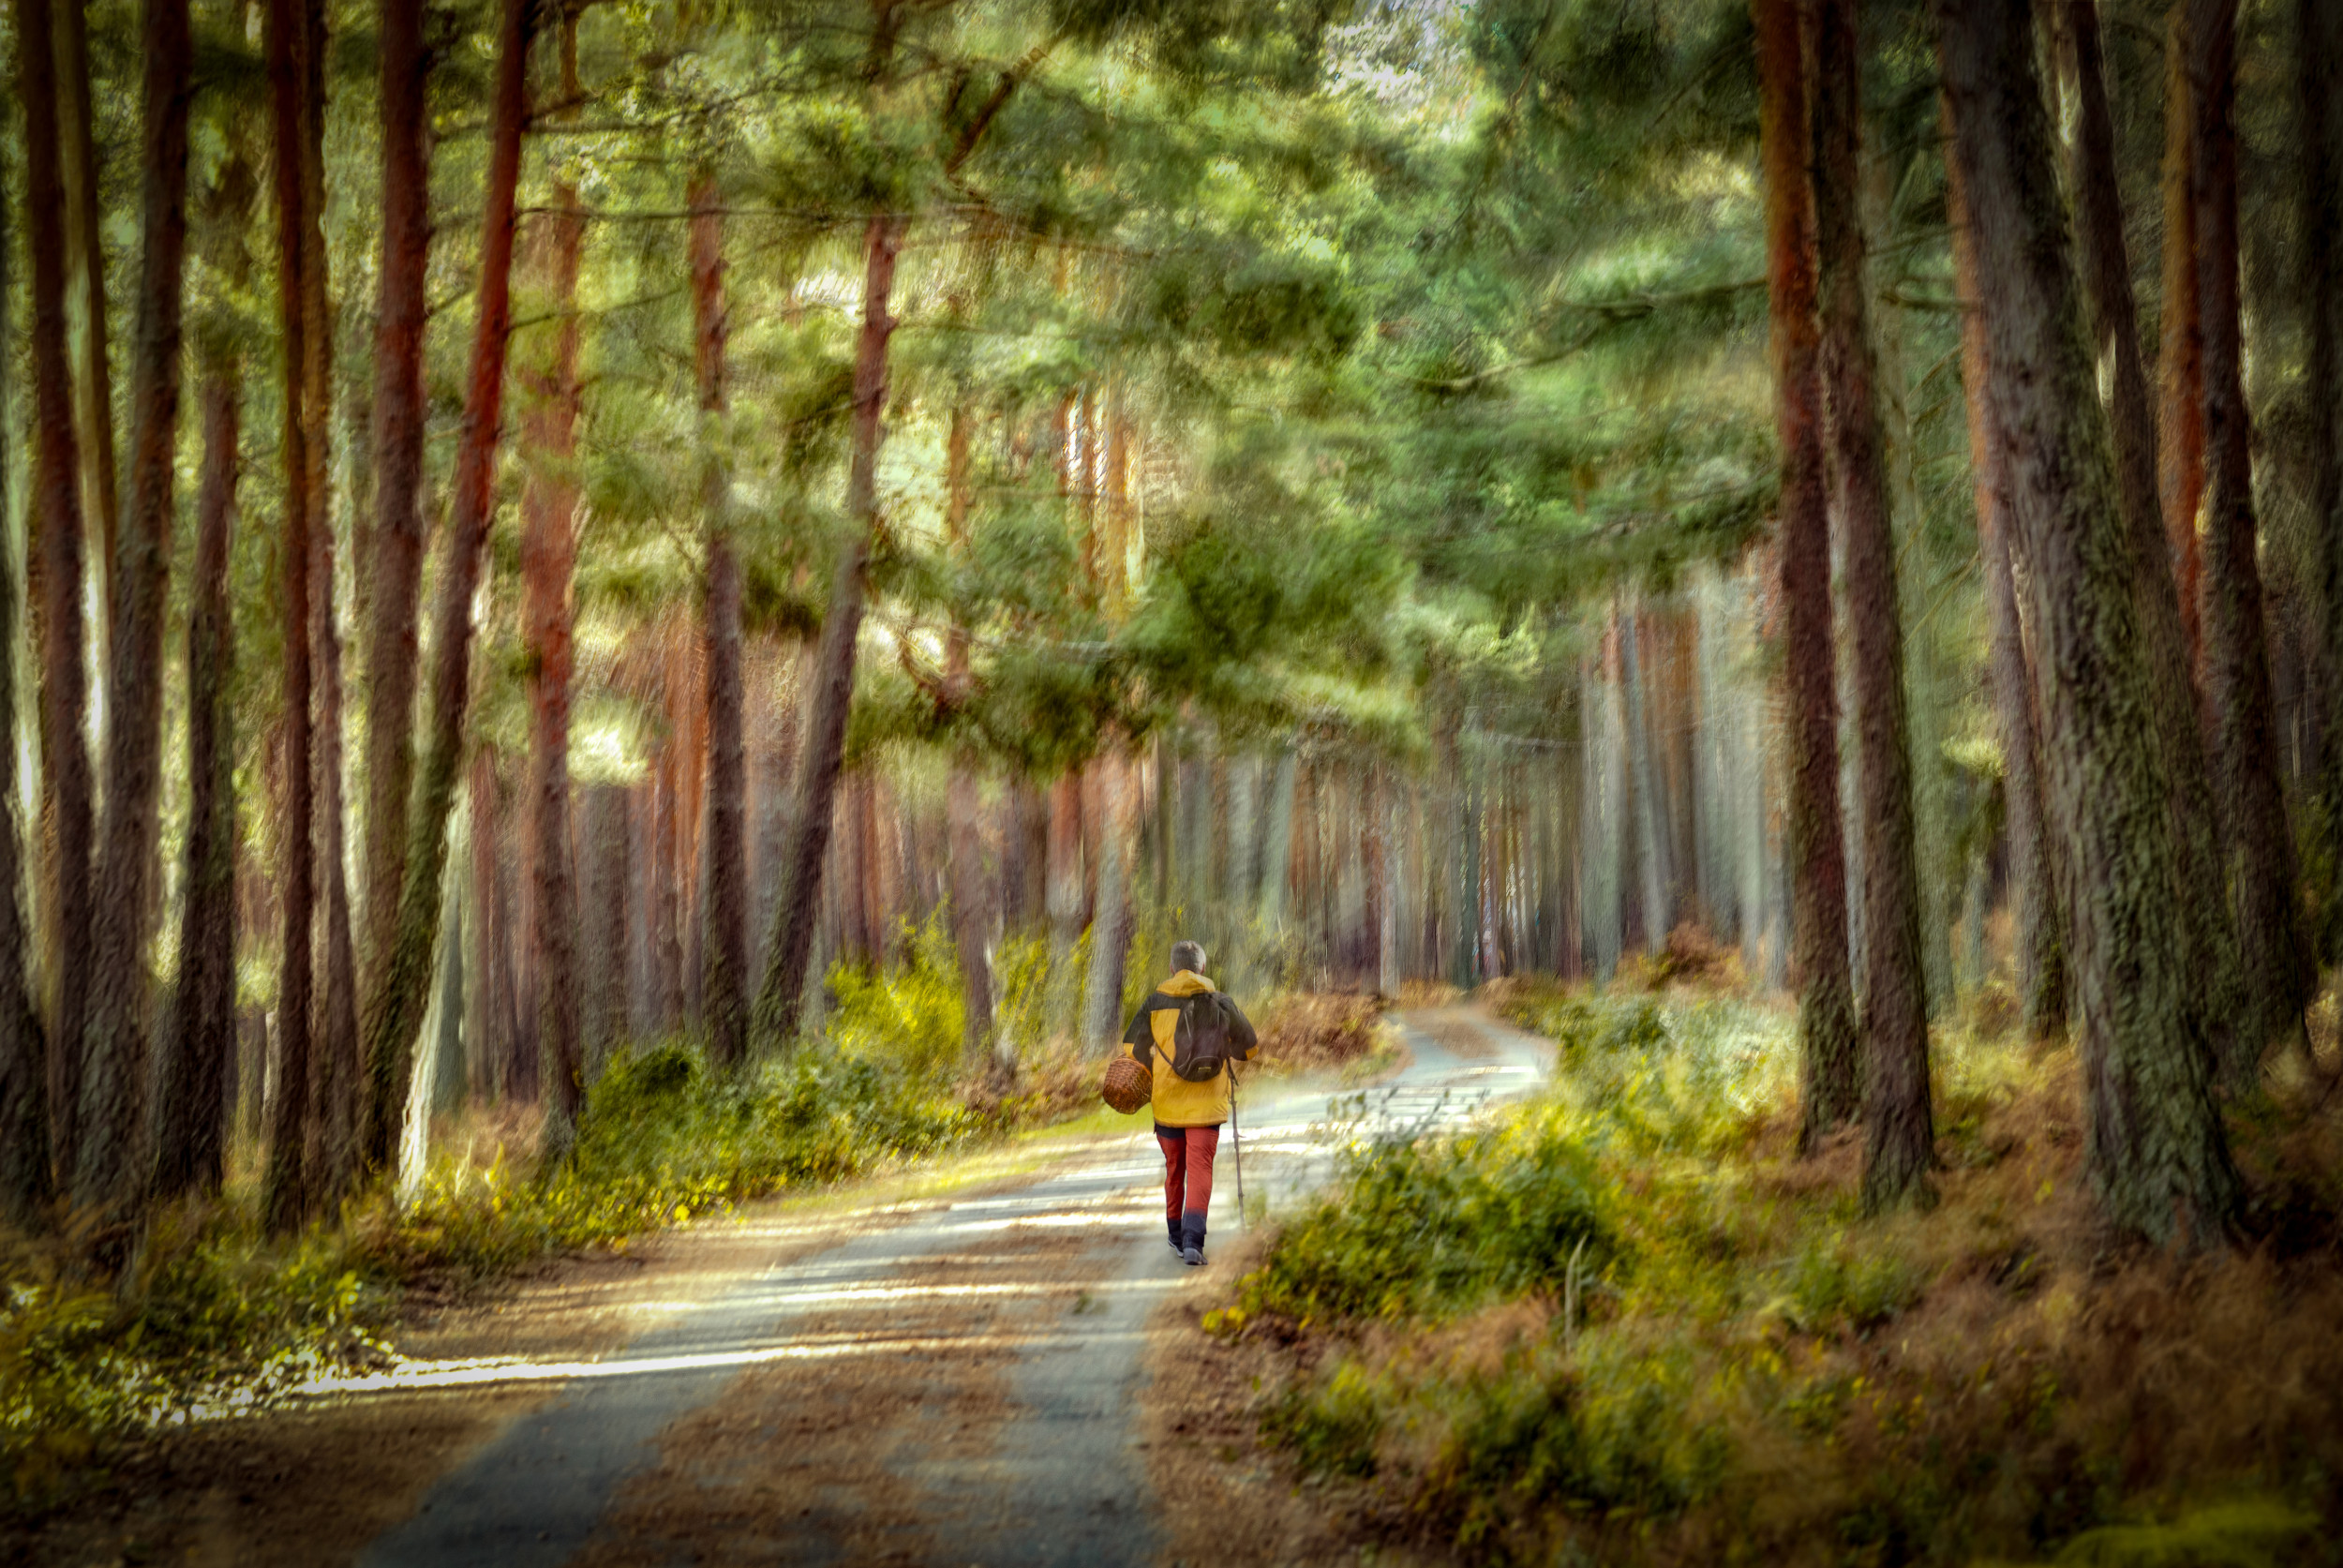
I’m not looking for a perfect or overly sharp photo. What I want is a photo that conveys something: light, colour and a sense of life. I care more about how the picture makes you feel than I do about technical precision. Light and colour take centre stage, with detail coming second. A hint of movement or blur helps to capture that fleeting moment, as if the scene itself were breathing.
I try to capture the atmosphere of the place, so that the viewer can sense the air, time of day or mood. In short, I want the photo to be experienced rather than just seen.
For some time now, I’ve been taking photographs with the Canon EOS R5 Mark II and various Canon lenses for some time.
The two I use most are:
• 24–105 mm f/2.8
· 24–240 mm, very practical because it’s light and compact.
Although I’ve never formally studied art and am no expert, I’m passionate about it. I try to take impressionist photographs of everyday scenes that capture texture, colour and light. The image may be blurred, with colour appearing as patches, or it may be clear, but light and colour must dominate the scene, taking precedence over detail. My aim is for the atmosphere created by light and tone to be felt, so that the image evokes a visual emotion.
Circumstances and Settings
Initially, I considered using multiple exposures, but adjusting the exposure manually between each shot took too long and didn’t produce the desired result.
I usually work in Av mode, adjusting the exposure and ISO.
My goal was to capture three images: one very bright, one dark and one correctly exposed. I wanted to include a bit of blur or camera shake in one of them.
To achieve this, I used high-speed continuous shooting (H+) with automatic exposure bracketing (AEB), set to a range of –2 to +2 EV.
Holding down the shutter button takes three consecutive shots before stopping.
This allows you to repeat the process several times, shifting the exposure up or down using the aperture dial.
It isn’t a rigid process since it depends on the time of day and how much sunlight there is.
When shooting at ISO 100 with shutter speeds ranging from 1/10 to 1/125 of a second, I sometimes need to adjust the exposure value (EV) by 1 to 3 stops, depending on the desired effect.
Shorter exposures enable subjects to move slightly between shots, allowing me to create motion or soft blends in parts of the image.
Settings
Exposure bracketing: –2 to +2 EV
· Foto 1: ISO 100, 24–240 mm at 52 mm, f/16, 1/60 s (darkest)
· Foto 2: ISO 100, 24–240 mm at 52 mm, f/16, 1/25 s (correct)
· Foto 3: ISO 100, 24–240 mm at 52 mm, f/16, 1/10 s (brightest)
Color space: sRGB IEC61966-2.1
Bit depth: 8 bits per channel
Resolution: 72 dpi (44 Mpx)
Post Processing
This stage is highly personalised, with the steps depending on each person’s artistic inclination and desired outcome.
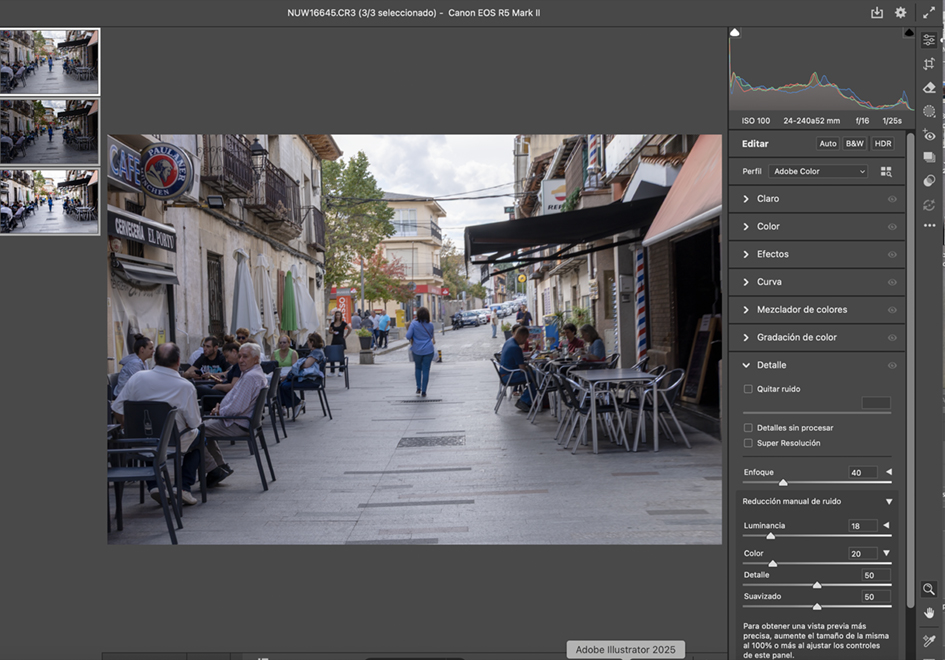
I open the three RAW files simultaneously in Photoshop (Beta 27.1.0).
Then, in the Edit column on the right:
· Click AUTO.
· Under Detail, set Color Noise Reduction: 20 and Noise Reduction: 18.
· Under Optics, check the correct lens profile.
Finally, click OK to open all three images.
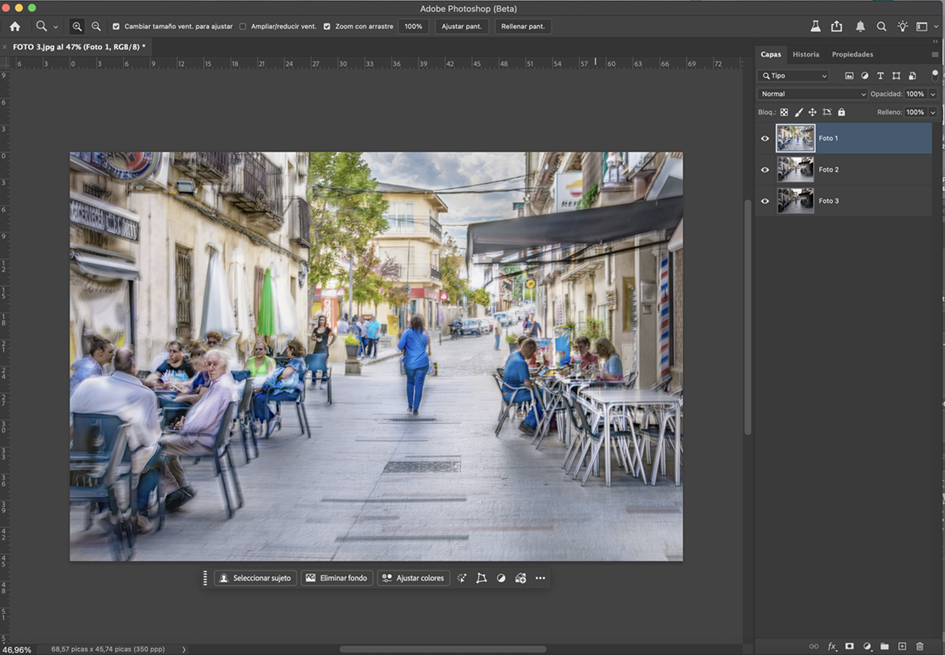
Next, I drag the layers of two images over the third to have all three in one document and align them using:
Edit ▸ Auto-Align Layers
It’s often necessary to adjust one layer manually to get the desired motion or blending.
Considering subject shifts between exposures, I organize the layers as follows:
· Layer 2: brightest and most motion-blurred image
· Layer 1: correctly exposed image
· Layer 0: darkest image
· Eraser (E): low opacity, erase on Layer 2 and move down to Layer 1 as needed.
· Dodge /Burn (O): essential for depth, contrast, and light or color emphasis.
· Remove Tool: resize, with Generative AI off; also used at the end to remove unwanted details.
· Other tools: Brush (B), Clone (S), Crop (C), Free Transform (Cmd/Ctrl + T).
When needed, I use the Camera RAW Filter to refine texture, color, temperature, highlights, and shadows.
I rarely use the Filter Gallery or Neural Filters — I prefer basic, manual development for each exposure.
However, a Neural Filter can be useful to create a color-patch layer to insert between the three main layers.
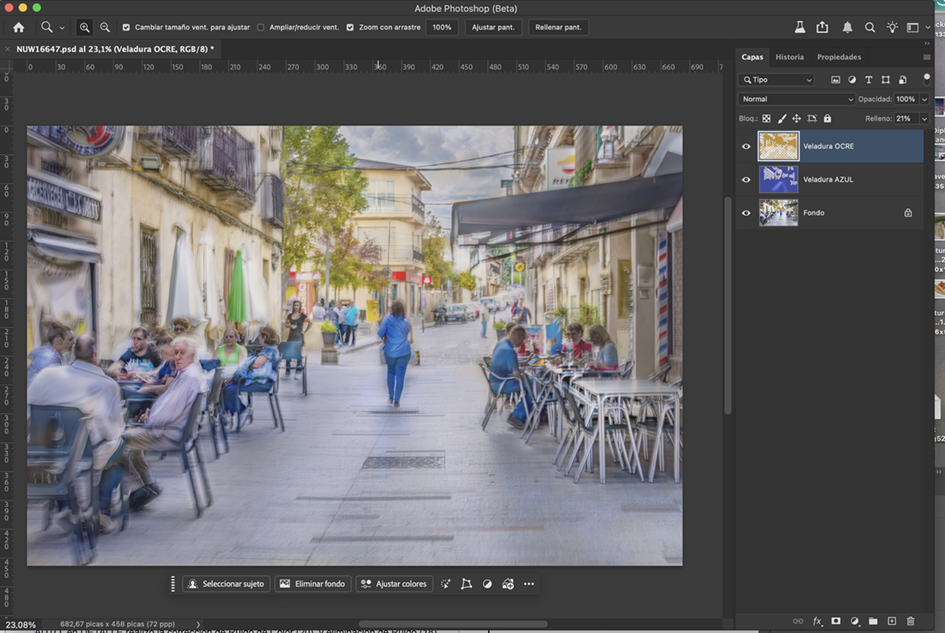
The glazes are applied to the final flattened image, creating two colour layers.
I select tones using the Eyedropper tool (I) and then adjust them to the desired hue.
I reduce the opacity and erase in selected areas with varying intensity until the atmosphere and colour interaction feel balanced.
For your information: the exact same workflow was applied to the following images ;-)
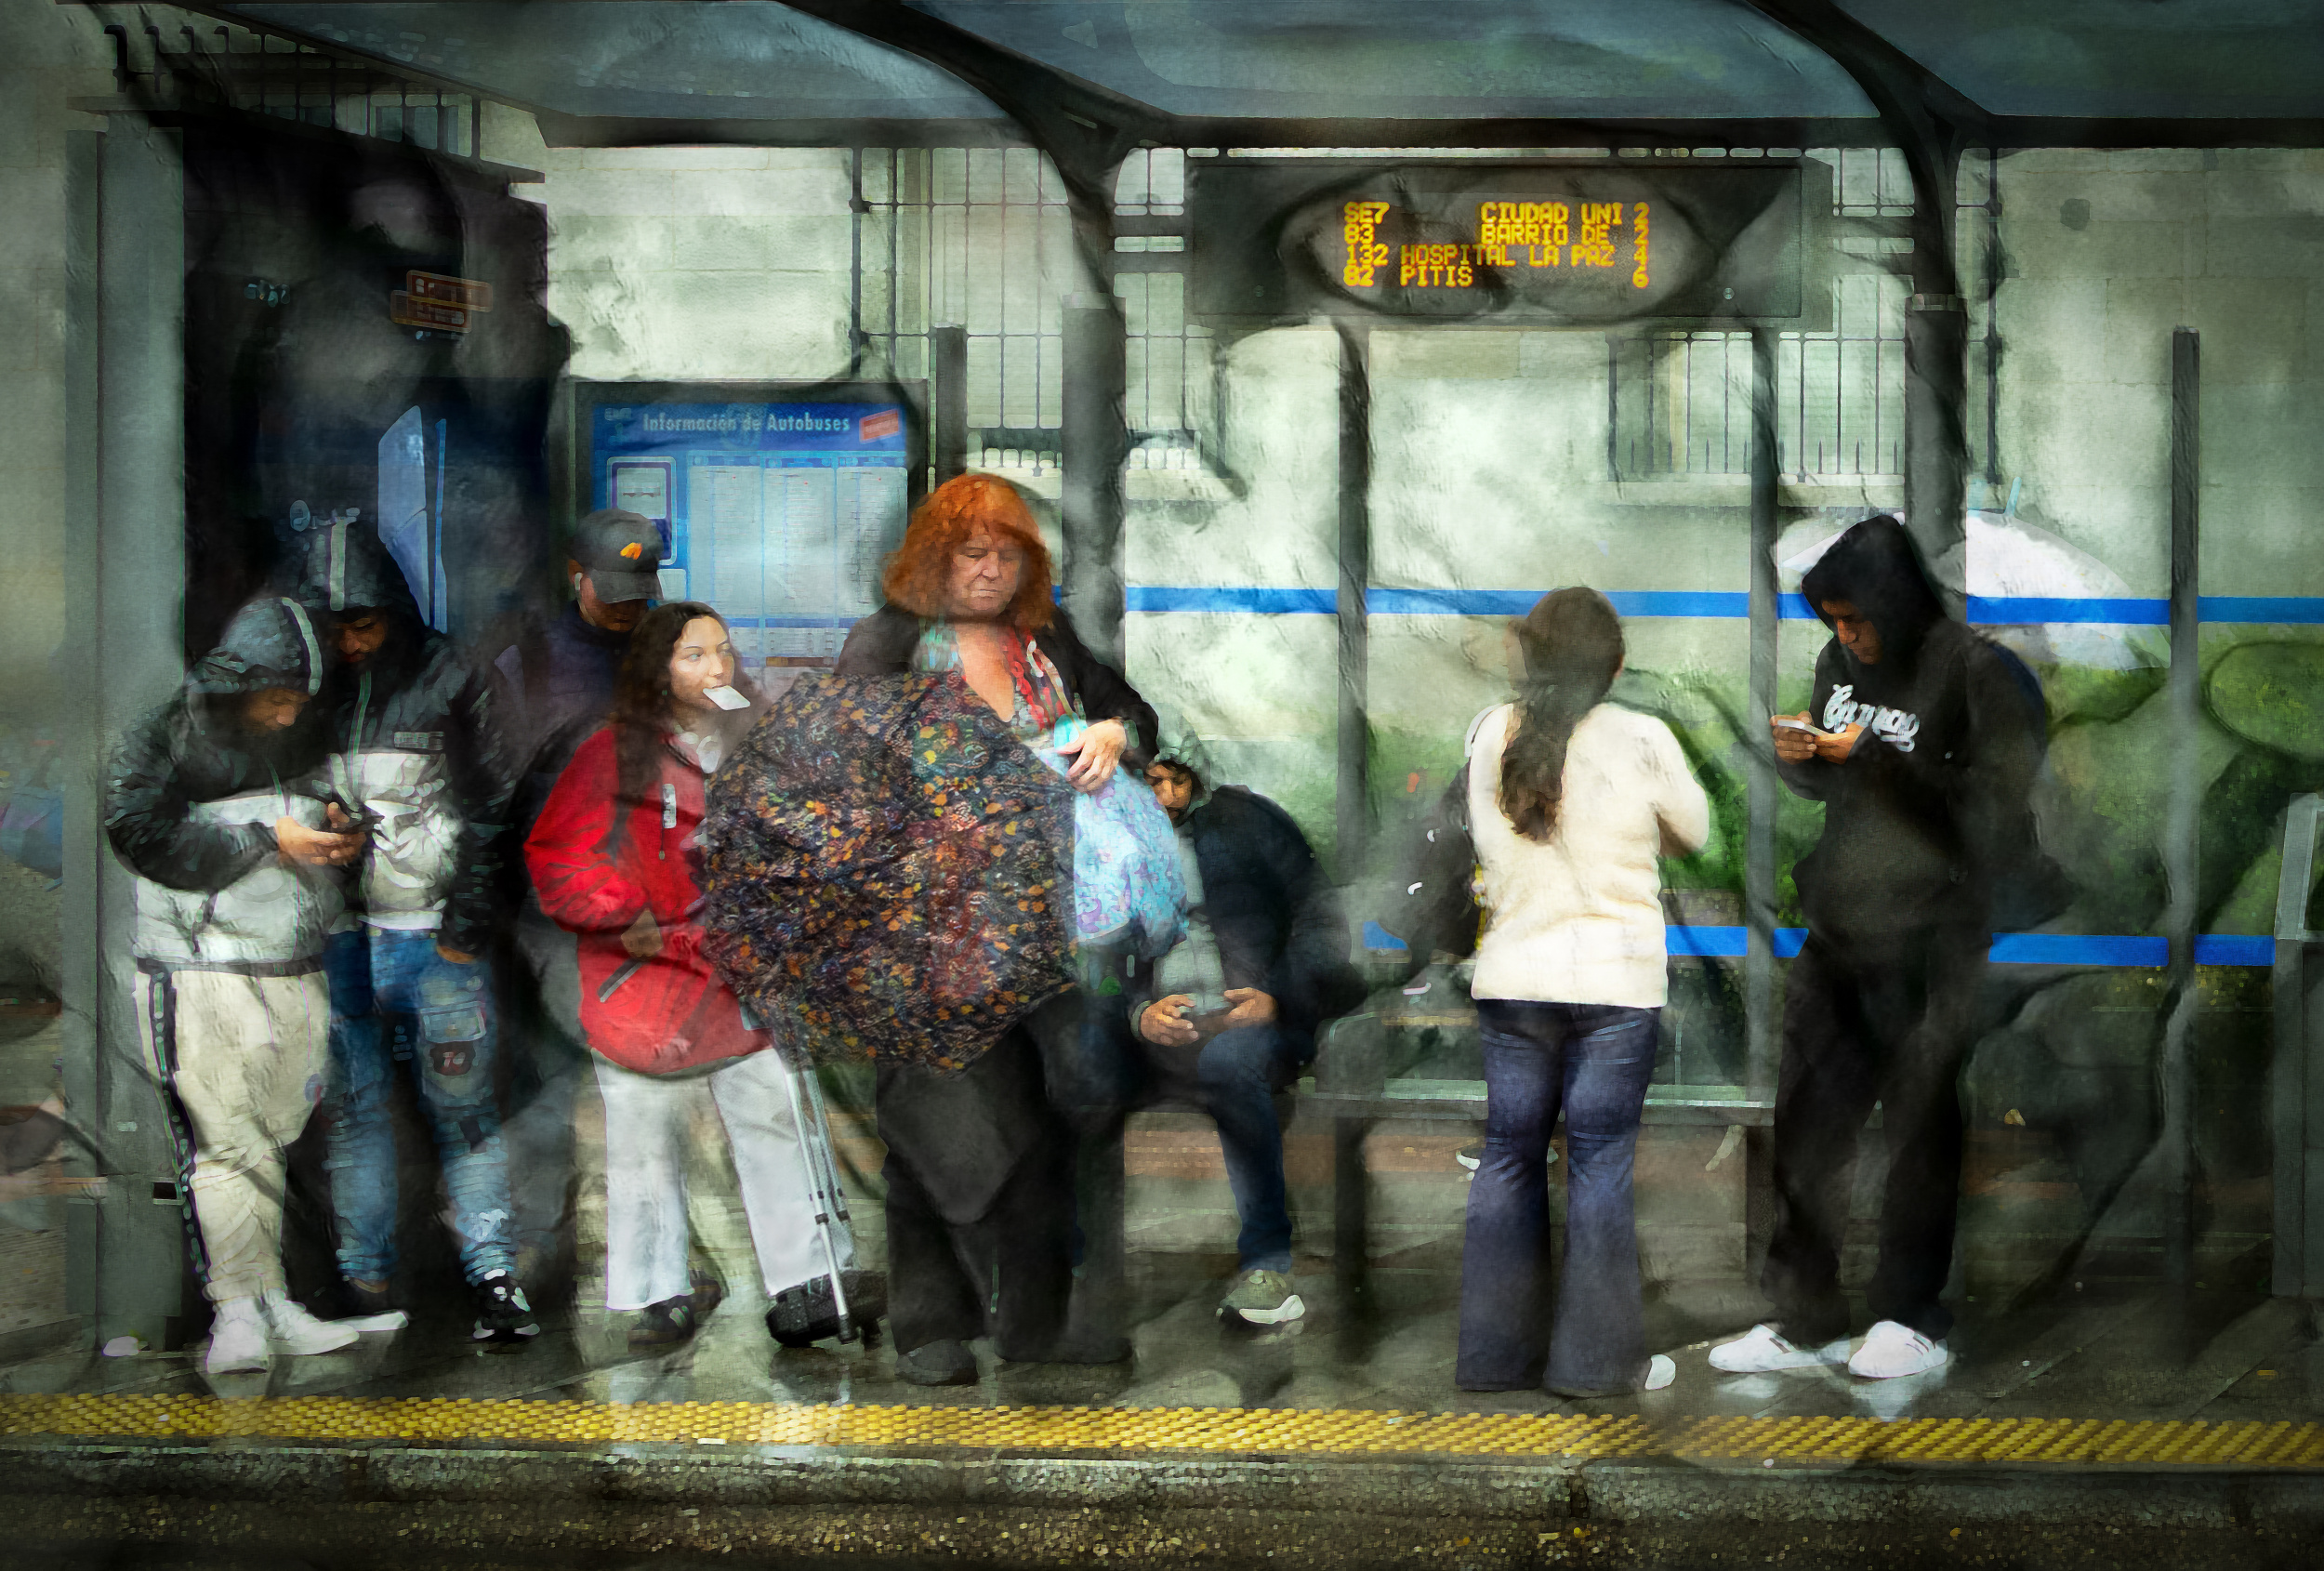 'Rainy Stop in Moncloa'
Biography
In photography I’ve gone through different stages, shaped by my work, my health, and my age. I’m 76 years old, now retired, and most recently I’ve become involved in impressionist photography.
• At eighteen,I went to London to study English, working to pay for my classes and my first camera.
• During my military service in the Sahara (Aaiún) I learned to develop black-and-white photographs and to make photo montages.
• Later I worked in a recording studio and then for an American multinational, installing recording equipment and sound consoles throughout Spain. That job allowed me to photograph many landscapes and towns during my travels. I used Ektachrome and 3M film, although I have never digitized those images.
• At forty-eight I left the multinational and founded my own company, Grafismos y Publicidad BBF.
In the company we produce relief images up to 4 mm, methacrylate panels up to 5 meters, and other products related to design and architecture.
 | Write |
 | DonnaHom APA PRO Thank you for sharing the thoughts behind the image and the post processes. Greatly appreciated |
 | Patrick Compagnucci PRO Alberto, thanks for taking the time to share your work flow with us. Greatly appreciated! |
 | Alberto de la Cruz PRO Thank you very much |
 | Subhajit Das PRO Very interesting and informative. Thank you so much for sharing! |
| Alberto de la Cruz PRO Thanks |
 | UstinaGreen PRO Thanks a lot for your great topic of creative processing!
Very interesting and motivitions! |
| Alberto de la Cruz PRO Thanks |
 | Jesus Concepcion Alvarado PRO Enhorabuena por tu trabajo |
| Alberto de la Cruz PRO Muchas gracias Jesus |
 | Zhifei Chen PRO 非常精彩的介绍,尤其是流程的思路让人获益匪浅 |
| Alberto de la Cruz PRO 非常感谢你,Zhifei Chen。 |
 | Miro Susta CREW Very interesting workflow introduction thank you Alberto, Michel and Yvette |
| Alberto de la Cruz PRO Thanks Miro |
 | Sailendra Nath Samaddar PRO Excellent creative workflow. Thank you for sharing.. |
| Alberto de la Cruz PRO Thanks |
 | FranzStaab PRO Very informative and interesting, thanks for the recipe! |
| Alberto de la Cruz PRO Thanks |
 | Jacob (Jian) Xu CREW Very creative and artistic street pictures, thank you very much for sharing! |
| Alberto de la Cruz PRO Thanks Jacob |
 | Bole Kuljic PRO Very nice and informative presentation. Thank you. |
| Alberto de la Cruz PRO Thanks Bole |
 | Eduardo Blanco García PRO Estupendo y muy interesante |
| Alberto de la Cruz PRO Gracias Eduardo |